A question came in about working with video in Photoshop CS3. The answer to "how do I get the video back out of Photoshop once I'm finished?" prompted a discussion that I'll share with you.
To get the video back out of Photoshop CS3, click on File>Export>Render Video.

The first screen contains a lot options. For this exercise, we're primarily concerned with the File Options section - QuickTime Export Settings. We actually have to click on two settings buttons to get where we want to be. The first click brings up the Movie Settings dialog box. This box also contains a Settings button. Click on that button to get to Standard Video Compression Settings.
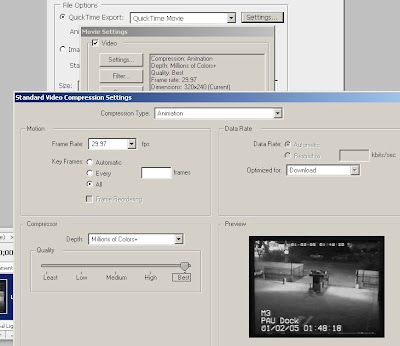
There was much more to the export answer than just a few clicks and you're done. At the default settings, the Compression Type is set to Animation. Unless we're distributing this video on YouTube, we'd rather not have any additional compression. In this case, we'll choose None. For the YouTube submission, try the H.264 option.
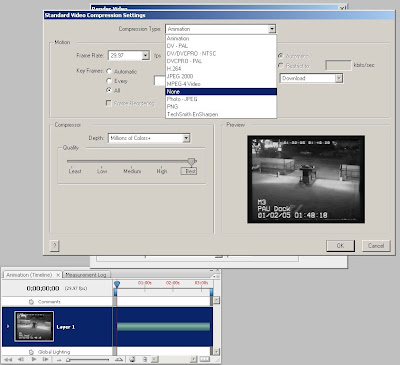
Selecting None, make sure that the Compression slider is set to Best and click OK. Make sure the settings shown reflect the projects actual settings for frame size and rate and click OK again. A third OK, after choosing file name and location, and you are exporting video.
Just a simple answer and accepting the defaults would have lead the reader to further compress his video. Again, for us, this is not acceptable. We can work with video in Photoshop CS3 and keep the recompression down to a bare minimum.
Enjoy.
Find the new book, Forensic Photoshop, by clicking here.
No comments:
Post a Comment