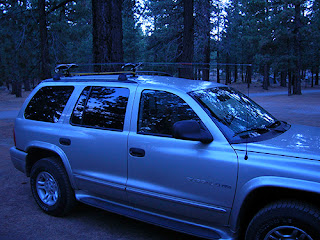
Rob shot this whilst on a fishing trip last year. Notice the decidedly bluish purple cast.
I opened this up in ACR and tried the auto white balance, but it didn't work. I followed my 2 minute rule; I couldn't easily adjust it in ACR within 2 minutes, so I opened it up in Photoshop to fix it there. With images like this one, I knew just the way to fix it. After today, so will you.
Removing colour casts with Match Color
Ordinarily, you would use the Match Color command to take the look and feel of one image and apply it to another image. This is popular in the advertising world; a client likes the colours from one set of images but the layout in another. Rather than re-shoot, you can use Match Color. Aside from this, the Match Color command can do quite a bit of adjustments. The Match Color command gives you control over both the luminance and the colour components of the image. Using Match Color to remove colour casts, we will be fixing the colour in a single image rather than matching the colours between two images. In this method, the image we'll be fixing is both the source and the target image.
Let's begin.
- Click Image>Adjustments>Match Color. In the Image Statistics area, choose None in the Source menu. This option specifies that the source and the target are the same image.
- We want to automatically remove the colour cast, so we'll select the Neutralize option. With the Preview option selected, you can see your image being updated as you make adjustments.
- To increase or decrease the brightness in the image, adjust the Luminance slider. As in other Photoshop controls, moving the Luminance slider to the left darkens the image, and moving the slider to the right brightens the image. In this case, I used the slider to brighten up the image a bit.
- The Color Intensity slider works a lot like a Saturation slider. Moving the Color Intensity slider to the left reduces the color range, and the image becomes monochromatic. Moving the Color Intensity to the right increases the color range and intensifies the colors. I bumped this image up just a wee bit.
- If you need to back off of the effect, adjust the Fade slider. For this image, I did not fade the effect.
- Having made all of the adjustments, click OK.
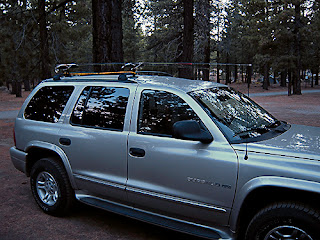
The final result should look like this:
Tomorrow, we'll keep going on the colour cast road and look at some channel fun ...
No comments:
Post a Comment