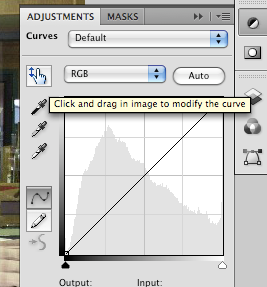
Meet the On-Screen Adjustment Tool.
To utilise this new feature, simply apply a Curves adjustment layer as you normally would, or do it the CS4 way by clicking on Adjustments and then the Curves icon. Notice the icon in the upper left hand corner of the panel. Click on it. Then find the spot in the image that needs adjusting. Click and hold within the image and the icon will change from an eyedropper to an up/down arrow. Keep holding that button down as you slide the cursor up/down to adjust the curve in real-time. You'll see the results on screen as you work. If your work has blown out highlights or shadows somewhere else in the image, simply repeat the process in those spots and balance the image. It couldn't be any easier.
Here's a quick movie clip to show the power and ease of this new feature.
Sure you could do stuff like this before. But, not this easy.
1 comment:
Thanks..This was useful.
Post a Comment