Thankfully, there are a few ways of solving this problem quickly. You can hunt through all of the settings to see what's changed and fix them individually. But, occasionally the settings file itself is the problem. So how do you fix a damaged Settings file?
Hold down the Ctrl+Alt+Shift keys whilst starting Photoshop. Doing so will bring up the following dialog box. Click Yes and Photoshop will delete the file and build a new one with the default settings. That's the easy way and it works from version 6 on up.


The hard way is to find the file on your hard drive and delete it manually. To start with (we'll use Windows to answer the question), make sure that your computer is showing all files and folders by selecting Tools>Folder Options from the Explorer and then clicking on the View tab. Make sure the radio button for Show hidden files and folders is checked.

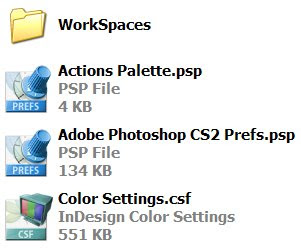
Then, locate the file by going to %windir%\Documents and Settings\~username\Application Data\Adobe\Photoshop\[version #]\Adobe Photoshop [version #] Settings. You'll see the contents of the folder that look like this. I happen to be running a virtual disk with CS2 installed (this question came from a CS2 user). Just drag the Prefs file into the trash.

With that done, launch Photoshop. It will build a new preferences file and you can start over with your preferred settings.
1 comment:
hmm, excellent tips, will keep this in the back of my mind. But being a mac user I never have these problems haha. Sorry couldn't contain it :)
Post a Comment