I've received a few e-mails from folks asking for a demonstration on sharpening in LAB mode.
With this technique, we are going to be targetting just the Lightness Channel - affecting only the lightness values in the image.
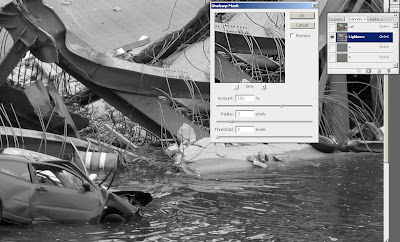
In today's image, detail is important. In a structural failure such as this, I want to highlight the sources of that failure. In this case, the bridge's details, the torn and twisted metal, the bent rebar, and the broken concrete all have a part to play in the telling of this story. I also want to make sure that the items in the water receive attention.
To begin, work the image as normal (focus correction, global light/colour, local light/colour) until you come to the Creative Sharpening stage. If you've performed the previous corrections in RGB, save the layered file before moving into LAB mode (Image>Mode>Lab Color). If you moved to LAB mode before making the initial corrections, continue on.
I mentioned earlier that we will be working with the lightness values only. Here's how it works:
- Press Ctrll+Alt+1 to select only the lightness values.
- Invert the selection - Shift+Ctrl+I.
- Click Ctrl+H to hide the selection.
- With the Channels Palette open, select the Lightness Chanel.
Selecting the Unsharp Mask filter (Filter>Sharpen>Unsharp Mask) brings up this dialog. For today's image, I've used Amount=150, Radius=3, and Threshold=2. You can toggle the Preview button on/off to preview the results.
When you've finished applying the filter, click Ctrl+D to deselect the lightness values (remember, you hid them earlier). Continue on with the workflow (saving as necessary).
When you are finished, you'll see that the difference can be quite dramatic.
Try this one for yourself. You'll be glad you've added LAB sharpening to your tool box.
Enjoy.


5 comments:
Hey there...I have been enjoying your blog for quite some time now (subscribing to your feed). I work with Jeff at Everett PD (in Washington State) as a crime scene photographer and detective. He mentioned that he knew you so I thought I would drop you a line to say hello. Thanks for the info on your blog!
Thanks for stopping by and thanks for your support.
Since I began teaching Photoshop / Premier / digital CCTV Evidence Retrieval classes at NATIA, I've met so many wonderful and hard working people from around the world.
I'm glad you've enjoyed the blog. Hopefully, the book will be just as valuable a tool for you and your team up in Everett.
I always make myself available to the LE associations, like NATIA, the IAI, and LEVA, for training help. If your local chapter wants to host some Photoshop training, please feel free to send me a note.
Again, thanks for your support.
i have a scene pic here and i cant redefine with my current skill..hope u all can help me out...
Hi there.
I actually use this technique a lot. There's a second step, too, that I'll apply to more detailed (and high-resolution) photos.
Open up the Unsharp Mask dialogue box again. Enter in these values: Amount: 40. Radius: 80. Threshold: 1. With these values, I like to play with the radius and get it just right. Press Okay.
Check it out and see what you think.
very coool indeed
Post a Comment