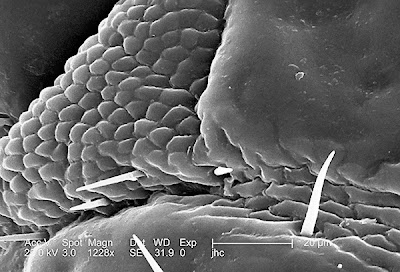
This morning's tip is a fun one: using the Sponge Tool to control local contrast. For this, we'll turn our attention to the image above.
To bring out the details in this image, I can use an curves/levels adjustment layer. I can further refine that adjustment with masks. With the Sponge Tool, I can target specific areas of the image quickly. Working on a separate layer, I can apply these edits non-destructively. Here's how:

In Grayscale mode, the Sponge Tool increases and decreases contrast by moving the levels away from or towards midgray - depending on the blending mode that is chosen in the options bar. Don't worry, the Sponge Tool only supports Saturate and Desaturate.
Try it for yourself. Saturate increases contrast whilst Desaturate decreases it.
Applied on a separate layer, you can fade the effect with the opacity slider to get your image looking just right.

Enjoy.
No comments:
Post a Comment