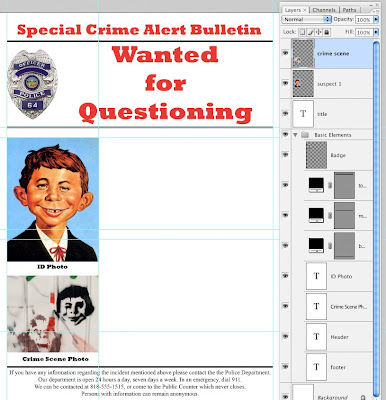
Thanks for the patience over the long holiday weekend. Let's take a look at where we are with this project, creating data-driven graphics.
When documents that share common elements, such as wanted posters, the usual way of doing things is to design a document in Word or PowerPoint, make duplicates of it, and manually edit the text information and images for each suspect or person of interest. With Photoshop, there’s an automatic way to generate files that use the same layout but have different images and text. How? Variables, or place holders in the file that maintain position but contain contents that will be swapped out automatically by Photoshop. If you've ever done a mail merge in MS Word, you can do this in Photoshop.
So what do we need? We need a template, the variables, and a data set. Last week, we designed the template in Photoshop using layers that contained text and graphics. Now we'll look at defining the variables.

In an external file, we'll want to set up a data set of text and graphics that uses the names that correspond to the variables that we create. Most of the data that we are working with is already contained within spread sheets - and this data can easily be exported to text files for Photoshop's use.
Look at the template that we've created. I've grouped the elements that won't changed into a folder. Those items that will change are on top, the suspect photo, title, and crime scene photo.
Now, we're up to date.
Let's define the variables. A layer can contain any of three types of variables.
- Visibility. This is an on/off option. Is it visible or not?
- Pixel Replacement. This option replaces a layer with an image. Perfect for suspect or crime scene images that will change from poster to poster.
- Text Replacement. Names and other personal information will be changed. So will titles, from time to time.
In our poster, we have three variables, the suspect photo, the crime scene photo, and the title text. You may have more or less, but three is an easy number to work with.
To define each variable, click on Image>Variables>Define. Within the dialog box, select the layer that will be assigned a variable. Under the Variable Type, click on the check box for the appropriate variable and name it - or select an existing variable. If you are swapping pictures and check the Pixel Replacement box, you'll want to specify how images of different sizes should fit on the layer. The Method drop-down box specifies a resizing method. It's best to resize your images ahead of time. Then, in this box, pull down to As-Is. Resizing all of your images also saves you from the unpredictability of the Alignment and Clip to Bounding Box options. Click Next to assign another variable. When you are done, you can click OK.
Next, we'll look at creating the data-set.
No comments:
Post a Comment