One of the great things about having a friend who is an image processing guru is that you can really dive into the inner workings of Photoshop's tools. Take, for example, the discussion that we had on the Smart Sharpen Filter.
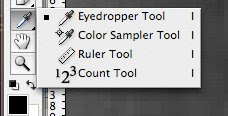
Chris Russ gave an outstanding explanation on finding the values necessary to place into the fields. He started with the Ruler Tool.
Next, we are looking for a disc shaped object within the image. Something that's near the object or person that we're trying to identify will work the best. In this case, I've chosen the drink cups under the counter. The disc shape is the key to unlocking the power of the Lens Blur setting.
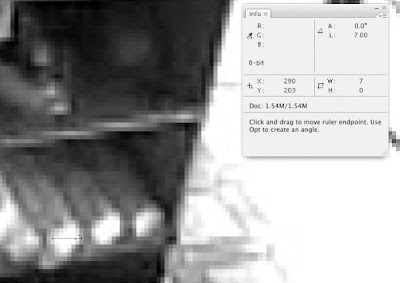
You'll want to have the Info pallet up so that you can read the length. In this case, our length (diameter) is 7.00. Then you'll want to divide this by 2 to get the Radius.
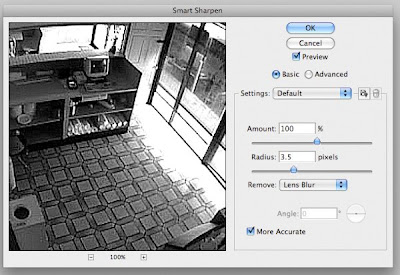
The result is then placed in the Radius field in the Smart Sharpen Filter's dialog box. In this case, the focus correction will be rather strong (as anything over a radius of 2 tends to be). If you need to, you can select Edit>Fade Smart Sharpen (50%) to reduce the intensity of the effect.
For those of you that were interested in Chris' book, Introduction to Image Processing and Analysis (written with his Dad, Dr. John Russ), you can find it on Amazon by clicking here.
No comments:
Post a Comment