Featured Post

Welcome to the Forensic Multimedia Analysis blog (formerly the Forensic Photoshop blog). With the latest developments in the analysis of m...

Thursday, July 31, 2008

Photoshop behaving badly

There may come a time when Photoshop does not behave exactly as expected. For a few folks at the NATIA classes, it was right during an exercise. How does this happen? It can happen for a number of reasons - and gets more complicated as the number of users increases on a single machine.

Thankfully, there are a few ways of solving this problem quickly. You can hunt through all of the settings to see what's changed and fix them individually. But, occasionally the settings file itself is the problem. So how do you fix a damaged Settings file?

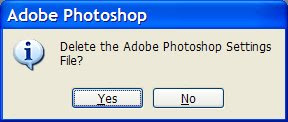
Hold down the Ctrl+Alt+Shift keys whilst starting Photoshop. Doing so will bring up the following dialog box. Click Yes and Photoshop will delete the file and build a new one with the default settings. That's the easy way and it works from version 6 on up.


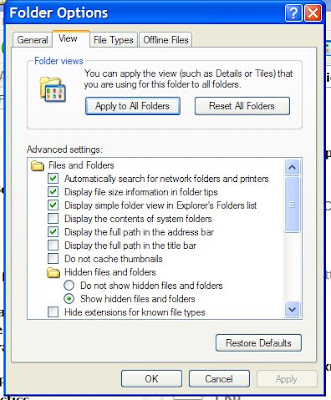
The hard way is to find the file on your hard drive and delete it manually. To start with (we'll use Windows to answer the question), make sure that your computer is showing all files and folders by selecting Tools>Folder Options from the Explorer and then clicking on the View tab. Make sure the radio button for Show hidden files and folders is checked.


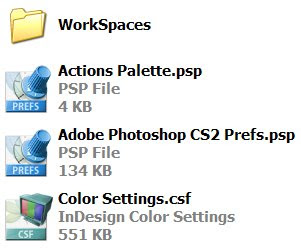
Then, locate the file by going to %windir%\Documents and Settings\~username\Application Data\Adobe\Photoshop\[version #]\Adobe Photoshop [version #] Settings. You'll see the contents of the folder that look like this. I happen to be running a virtual disk with CS2 installed (this question came from a CS2 user). Just drag the Prefs file into the trash.


With that done, launch Photoshop. It will build a new preferences file and you can start over with your preferred settings.

Wednesday, July 30, 2008

Flint seeks sponsors for police surveillance cameras

NASCAR is doing it, so why can't we? Check out this interesting article from Flint, Michigan.

Even if they aren't as effective for most crimes as increased patrols or improved lighting, cities are scrambling to get them installed.

Optimised Configurations

A question came in via e-mail about the best hardware set-up for running Photoshop. Aside from the obvious Mac oriented sarcasm, there are definite ways to speed up Photoshop.

George Middleton wrote an excellent piece last year called "Photoshop Acceleration Basics 2.4 - A MacGurus Guide to Photoshop Performance Acceleration."

OK, I know it's Mac-centric. But, there is valuable info there which can be useful for Windows users as well. He's included some helpful charts of performance data that can be used for your purchasing justifications (isn't a 7,200 RPM drive good enough for your start-up disk?).

Tuesday, July 29, 2008

Video Codecs - in detail

DSP Design Line has an outstanding series on Video Codecs. Part 1 deals with Intraframe coding and bitrates. Part 2 deals with Interframe coding: MPEG-2 & MPEG-4. Part 3 jumps over to Video/Imaging Design Line and explains H.264 and Video Over Networks. Part 4 will be released tomorrow and looks at Wavelet codecs. 

The series is excerpted from John W. Woods' "Multidimensional Signal, Image, and Video Processing and Coding." Order this book today at Elsevierdirect.com or by calling 1-800-545-2522 and receive an additional 20% discount and free shipping. Use promotion code 92004 when ordering. The discount is valid only in North America.

Lightroom 2 now available

Adobe announced today that Lightroom 2 is now available.

I'll be working on a full treatment of the new release and what it means for us over on the Forensic Lightroom blog.

Adobe Camera Raw Updated

For those who do not have their software set to automatically update, Adobe has released a Camera Raw and DNG update. The updates are available on their download page. (Help>Update) Camera Raw goes from 4.4.1 to 4.5, adding support for a few more cameras as well as tightening the integration with Lightroom 2.

Friday, July 25, 2008

Calibrate your eyes?

"My monitor is pretty good. My eyes are pretty good as well. My monitor looks all right to me. Do I really need to calibrate my monitor?"

Great question. There are several hardware/software combinations out there to calibrate your monitor. But, what about your eyes?

  
Brightness and colour contrast standards courtesy of
Center for Cognitive Neuroscience, Duke University

Check out the Center for Cognitive Neuroscience's "See it for yourself" page. See just how "off" your perception may be. Read the explanations as to why you see things the way in which you do. The results will surprise you.

Can Vista show thumbnails of my RAW files

In a discussion about RAW usage and the perils of Vista, a question came up about Vista's ability to show thumbnails of RAW images. 

Interestingly enough, Microsoft has an answer to this. Check out the download section of Microsoft's Pro Photo site. Most of the popular Canon and Nikon cameras are supported, as are Sony, Pentax, and Olympus. Vista should try to resolve this problem automatically. But, if it doesn't or can't for some reason, download and apply the correct codec and enjoy RAW support throughout Vista.

Thursday, July 24, 2008

Help for Office Outlook Users

This one is a Windows / MS Office Outlook only solution, but it's pretty cool.

Microsoft Pro Photo Shoot is an Outlook add-in that allows you to add client and equipment info to your Outlook appointments.

This is actually a rather nice little gem. Think about all of the gear you own (or is in your shop). Simply list it in the Equipment Pool. Then, when you are setting up appointments or field work, just select the equipment that you'll be using. It helps you keep track of your gear - giving you a handy check list of what you are bringing (and bringing back). It's also quite helpful in groups that share Outlook calendars. You won't have to worry about double booking a piece of gear.

Check it out.


RAW work around

In answering some of the questions from the NATIA Photoshop classes, it made me realise just how many people had yet to upgrade to Photoshop CS3. Sometimes, budgets get tight and that additional money is just not there. With that in mind, there was a question about using RAW files with the older version of Adobe Camera Raw (supported by Photoshop CS2).

There is a work around for this.

Click here to visit the Adobe Digital Negative Converter page and check to see if your camera is supported. Then download the Adobe Digital Negative Converter. Use it to convert your RAW files to DNG files. Then, simply open the DNG files in your version of ACR.

It's always best to get the latest version of the software. But, when budgets are tight ... you"ll need some help. As always, we're thinking about you. You might consider adding a software upgrade support contract to your next purchase. In that way, you'll have the upgrades pre-paid. Just a thought.

Wednesday, July 23, 2008

iPhone Forensics

The new iPhone adds yet another line to the list of capture devices on the market for us image analysts to worry about. Getting to the data can be problematic if you aren't trained in computer forensics or don't have access to someone who is.

Thankfully, a new Rough Cut showed up on Safari Books, iPhone Forensics. It's a rather well put together book on getting everything out of an iPhone. The author even adds instructions for Vista users.

Check it out by clicking here.

Tuesday, July 22, 2008

When video drivers lie

Posted on the VirtualDub blog: "... For some strange reason, the driver was lying to me and actually running the full-screen display at 50Hz, but lying to my program and saying it was 60Hz, which of course totally trashed the program timing. I didn't notice because I'm on an LCD, which doesn't show a 50Hz refresh rate by flickering like a CRT would ..." Click here to read the rest of the story.

Want the latest version of VirtualDub? Click here.


Video Capture Poll

There was an outstanding question posed at the NATIA conference Photoshop class. It had to do with simple and quick techniques for pulling still images from video. Unfortunately, the answer depends on the editor. In class, we went over the options for pulling still images from Premiere Pro CS3 ... and I'll do it here in a future post.

I've started a poll in the side bar. It asks a simple question, "What editor do you use in working with video." I'd like to see what's being used and what's the more popular platforms. From that, I'll start the next series ... pulling still images from video editors. The poll results will determine the order of the future posts.

Please take a moment and complete the poll. If you have multiple platforms, check the appropriate box. If your editor of choice doesn't appear in the poll, submit it via the comments function below. In the future, we'll look at cameras. So, stay tuned.

Thanks ... and enjoy.

Thursday, July 17, 2008

Unwanted Colour Shifts


Sometimes, the changes that we make to light introduce unwanted colour shifts. This week at NATIA, we looked at a simple way to stop this from happening using blending modes.


Finding and setting the black and white points on this image proved to be a little challenging. But, we found values that worked using a Threshold adjustment layer. We cancelled the adjustment once we set our points (using the Shift key).


A Curves adjustment was easy once our Black and White points were chosen in the image and the values were set in the dialog box. With this image, there is a bit of a hazy cast that we wanted to get rid of. But, once we set our values - the colours shifted. Not wanting this effect, we needed a way to just affect the light (tone).


We set our blending mode to Luminosity, thus limiting our changes to the tonality of the image and leaving colour unchanged. With that, the haze was gone.


Monday, July 14, 2008

DAM Update

In a previous post, I mentioned that I'm looking at a few Digital Asset Management options. Specifically, I am working with Filemaker's Bento and Adobe Photoshop Lightroom to see which will work for me, what the issues are going to be, pitfalls, good points, must haves and so forth.

I'm just about ready to post a long series on my findings on my Forensic Lightroom blog. 

Stay tuned.

Friday, July 11, 2008

Clip Notes for Collaboration

Well, the first day of the NATIA Pre-Conference classes has come to a close. Today was jam-packed with opportunities to learn new things and bounce ideas around. And, who could ask for a better venue, Adobe headquarters.

I know that this is a Photoshop blog, but you have to get the images to Photoshop somehow. For those looking at adding Premiere Pro CS3 to their labs, or for those who have it already, Dave Helmly showed off an outstanding collaboration tool that's built into the program. It's called Adobe Clip Notes.


If you are working with someone across town, or across the country, how do you get a video clip to them? How can they sit down and identify which frames to pull and work on without being there next to you? Adobe Clip Notes. Sure it's been around for a little while, but did you know it was there? Did you realise how much time it could save you? Let's take a look at how easy it is to use this powerful tool.

When you've finished your work in Premiere and are ready for your colleague's input, click on File>Export>Adobe Clip Notes. It'll bring up the Export Settings dialog box. From here, you can choose to add a password and secure the document - or leave the password field blank. Really, just enter your e-mail address and click OK. Now, the feedback will be directed to your mailbox.


The program packages up the video clip into a standard Acrobat file, a file that anyone can use with the standard free Acrobat Reader (hopefully you'll have Acrobat Pro). The person reviewing the file can enter his/her name in the Reviewer Name field to help you track who wants what frames. Then, they simply play the video. When they come to a point where they want a frame, they can press the pause button. The time code is entered automatically in the notes field and the Reviewer can enter some descriptive text. 

When they are finished, they just have to press the Save and Export buttons. Their e-mail program is launched and the exported data file is attached to a message addressed to you. When you receive the XFDF file, save it in the folder containing the original Clip Notes file. Then, double click it. You see the Reviewer's notes - giving you instructions on which frames to export to still images. You can then work on the images in Photoshop - as usual.


This little gem has been hiding under our nose for a while. Premiere Pro users, check it out. You'll quickly see ways to utilise this handy little tool. If you are looking to buy Premier - this is just one more reason to add to your list.

NATIA Nationals - Pre-Conference Day 1

What a day.

Today featured a power packed day of exploration into the heart of the Adobe Production Suite CS3. The audio track students got lots of hands on time with Audition 3 and Soundbooth CS3. The students of the imaging track took Premiere Pro CS3, Captivate 3, and Lightroom for a spin. It was one of those days where your head feels like it just can't take any more info.

Sitting in the imaging track, I was amazed by the decades of knowledge available and willingly shared by Dave Helmly (Premiere Pro CS3) and Julieanne Kost (Lightroom) in person - and learning about the power of Captivate 3 via a Acrobat Connect session from San Diego, Ca.

How do you follow that up? Tomorrow features two classes of Photoshop CS3, basic (with Adobe's Rick Miller and myself) and intermediate/advanced (with Adobe's Julieanne Kost).

Thursday, July 10, 2008

NATIA Nationals - arrival day

Do you know how I can tell that coming to Adobe for training was/is an excellent idea? Check out these quotes from Dave Helmly
  • "Video is just like working with 30 pictures per second."
  • "What do you mean 'you can't work at the field level in Premiere.' Of course you can."
It's going to be a great week.

Optimising Images for PowerPoint

Here is an excellent tutorial from UC Davis to help with optimising images for use in PowerPoint or Keynote presentations. It was written for CS, but much of it still applies.

Wednesday, July 9, 2008

Forensic Photoshop Tour Stop - San Jose, CA

The Forensic Photoshop tour hits the road tomorrow. Next stop, the NATIA National Convention.

There will be two full days of training at Adobe headquarters with Adobe instructors at the helm. I'll follow this up with several classes focussing on Colour Correction and Noise Removal techniques. We'll have a lot of hands-on time and social hours will offer plenty of opportunities for questions and answers.

Bring your laptops and your copy of Photoshop CS3 Extended ... it's going to be an intense week.

Tuesday, July 8, 2008

CCTV's Effectiveness Called Into Question

A recently published study calls into question the effectiveness of CCTV as a crime prevention tool.
  • [CCTV had no] statistically significant effect in reducing the overall monthly crime rates within the target areas
  • CCTV had no statistically significant effect on monthly arrest rates for misdemeanor “quality of life” infractions in either [of the target areas]
"These differences between the apparent ineffectiveness of cameras to deter violent crimes, by comparison to their apparent success in deterring property crimes, may relate back to the underlying theory that some crimes, such as property-related offenses like larceny, are often opportunistic (Fabrikant 1979). In contrast, many violent crimes may be motivated by passions that make individuals less rational, more impulsive, and therefore less influenced by the risk of detection or apprehension."

“There is a constant tug-of-war between resources. Do we put another cop on the street or get another camera in place?” (Interview, Farrell March 27, 2008). Farrell further explained that even when criminal activity is detected on the CCTV system, it is not always possible to mobilize units quickly enough to respond if there are other, higher priority calls for service. Moreover, in Hollywood, the cameras are not routinely monitored during the day, and when they are monitored, there is generally one officer monitoring footage from 14 cameras; therefore, it is likely that there are criminals who have had the experience of “getting away” with crime in the monitored areas and may no longer feel deterred by the cameras."

"Policymakers considering video surveillance of public places by law enforcement should not presume that crime reduction or prevention will occur automatically — or at all."

"Law enforcement that does not have the resources to respond to crime and enforce laws, such as certain types of property crimes and minor offenses where cameras are located, may lead to the belief by criminals that some crimes are inconsequential. Following the “broken windows” theory of policing, criminals may eventually believe that they can commit more serious crimes in the absence of consequences, nullifying any deterrent effect the cameras may have."

Many thanks to Doktor Jon for the heads up on this publication. The tide may be turning against the "Carpet Bombing" of CCTV in cities. If you are going to arguing for more cameras, it may help to read this report. The opposition surely has.

Does video evidence collect itself?

An interesting post from a fellow blogger begs an interesting question. With the video security industry focussing on analytics and faster/smarter search capabilities - this still leaves the problem of collection and processing for court purposes. 

Video evidence has to be collected and properly preserved somehow - by someone. With the recorders only retaining data for X amount of days before recording over themselves, it has to be done in a timely manour or its gone forever. Add to that the proprietary nature of these systems - and the problem multiplies.

Food for thought. Yes, CCTV is great. But does video evidence collect itself?

More bad news for CCTV fans

From the Herald - Dublin, Ireland.

"City officials said in a report that there are a number of problems with "passive cameras", which are ones not monitored in real time but viewed after the event."

"The cameras have to be set so as to focus on a single small area, otherwise the footage captured would not be useful in identifying anyone involved in anti-social behaviour," the report stated.

"This requires that the anti-social behaviour happens 'in-shot'. Our experience in setting the mobile covert anti-dumping CCTV to capture instances of dumping in-shot leads us to the conclusion that this approach is only about 10pc effective in actually capturing an event of dumping," it added.

Many politicians still insist that placing more cameras in problem areas will help reduce crime. Unfortunately for them, the reality of this situation is beginning to be reported

This quote from the article pretty much sums it up, "And officials said, even when the dumping has been caught on camera, the council has never actually identified the culprit from the footage."

What do you do when your local leaders continue to help generate these mountains of image based evidence? You do as always, the best that you can with what you have. As workloads increase, you have a valuable resource - the Forensic Photoshop workflow.

Velvia Vision v1.5


The Velvia Vision Plug-In is one of those helpful apps that wasn't created with us in mind, but is incredibly useful in our workflow. Often enough, we get images that are washed out and the detail that we're looking for just blends in with everything else. This plug-in offers the ability to punch up the image and bring out the details in one simple yet powerful step. Download the plug-in and install it according to the included instructions. Activate it by clicking File>Automate>Velvia Vision.


By now, the interface should look fairly familiar. The Settings pull-down is there to help in speeding up your workflow. Included in the dialog is the Intensity slider that allows for an incredible amount of control.

The Smart Contrast options (from None to Contrast 4) allow enhancement of the tonal range without clipping highlight / shadow details. Contrast 1 is the safest option. Contrast 4 results in some range clipping, but it won't be noticeable when printing. In this example, I've used Contrast 4 along with the Smart Color Correction and Neutralize Midtones check boxes checked. With these boxes checked, the plug-in removes the subtle colour cast present in the image.


I wanted to really drive up the contrast and temperature so that the gun and mask stand out. To do this, I selected Intensity 3 from the Warm Colors drop down and Level 4 from Add Dynamic Range. Warm Colors, like it's name suggests, warms up the image. In this case, the image's cast caused it to be way too cool. Warm Colors, combined with Add Dynamic Range handles this problem quite well.

The Global Intensity Tweak slider works like a Fade Effect slider. This allows for us to back the entire effect off slightly if necessary. Before and After allow you to see the original and finished versions before you commit to the settings.

Finally, the Layer Options check box allows you to save the results to a new layer. It's not an editable layer, but it's helpful nevertheless.


Like all of Fred's plug-ins, this one is well worth the price. Download it for yourself and I think that you'll be as impressed with his work as I am. At less than US$25, you can't go wrong.

Monday, July 7, 2008

SI Pro v2.5 plug-in


Often times, the images that we receive are quite useless for court presentations. Take this image. 512x288 will be way too small to put on a poster to present to the jury. How are we to "blow this up" and make it presentable without blurring it to oblivion? Enter Fred Miranda's SI Pro v2.5 plug-in, now available for Photoshop CS3.


This new version of the plug-in offers some cool new features like pre-set and custom paper sizes, pixel dimension, margins, printer resolution ... or you can interpolate your images by scale. He's even added a downsampling option. More good news is the ability to work in 16 bit mode.

After downloading and installing the plug-in, you'll find it in the Automate menu, File>Automate>SI Pro 2

The Settings drop-down works the same as his other plug-ins. You have the ability to save and load settings, allowing you to speed up the process. The Interpolation drop-down offers three choices, Fine, Normal, and Coarse. Normal is the recommended and default option. The Fine option isn't recommended for slower/older systems. Think of these settings as intensity levels. Try Normal first, it should work just fine for most images.

As for Sharpening Level, there are three options here as well - No Sharpening, Low Sharpening, and High Sharpening. I would recommend selecting No Sharpening as we sharpen with a different tool after this step in our workflow. We don't want to oversharpen the image.

The Original Size window is quite handy. It shows your original file settings - in this case 512x288 for Pixel Dimensions and 7.11"x4" relates to your paper size. Resolution is also listed. For non US users, the Units drop-down lets you work in metric - the plug-in performs the conversion automatically.

If you select the Reduce Color Noise option, the plug-in will reduce the file's chroma noise before interpolation. As we will have addressed noise in a previous step in the workflow, we'll leave this box unchecked.

Now for the fun part, the Sizing Method. No more guessing. If you are interpolating for a print output, select Size for Paper. Then, simply enter the paper size and output resolution of your target device. You can even add a margin for those printers that don't support borderless printing. For this example, I went for a poster sized print. You can choose one of the listed sizes or use your own custom size. The Sizing Method also allows for interpolation based on a desired pixel dimension or percentage.


Once you've made the appropriate settings choices, click the OK button and watch it go (or I should say watch it grow).

Give it a try and I'm sure that you'll like it as much as I do. For less than the price of a good steak, this little gem can be yours.

Saturday, July 5, 2008

HP Offers Free Photoshop Class On-Line

Frequent readers of this blog will know that I haven't been a big fan of HP the company or HP products. But, free is free. With that in mind, check out this offer from HP. Free Photoshop training is free Photoshop training. Enrollment is open now and closes on July 31. The first lesson will be posted on the 10th. Subsequent lessons will be posted every few days. 

The class will end on August 8, so don't delay.